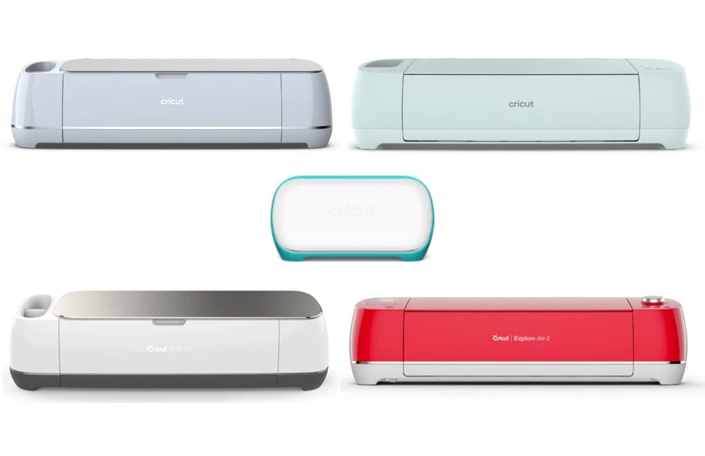
Completing the Cricut set up process for the products sold by the company is somewhere similar to each other. Cricut is a multitasking smart cutting machine that helps in creating small or big projects using any materials. Besides, they also provide a bunch of material bundles that are used in the next stages of the process. Other than that, the users are offered different models such as Maker, Maker 3, Explore 3, Explore Air 2 & Cricut Joy.
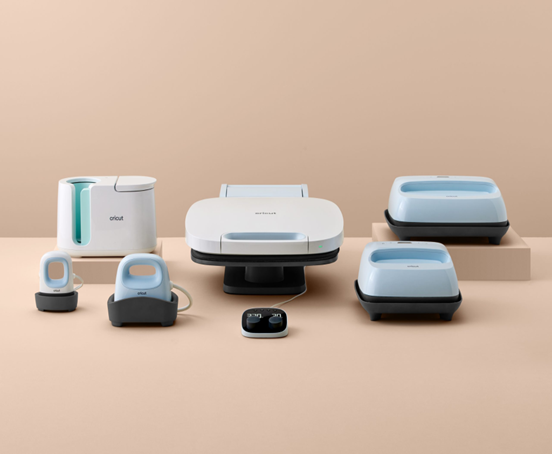
Following this, the company also sells various presses, including Cricut Mug Press, Hat Press, Easy Press & Autopress. Intending to get the exact result, all the users are instructed to install the cutters companion Cricut Design Space. Let us help you by introducing the method of setting up cut-die machines & heat presses provided by the company.
Cricut Set Up for Cutting Machines
As shared in the introductory paragraph of the post, Cricut offers different models to their customers at different price ranges. However, to get started with the cutting process, every crafter should have complete knowledge about the Cricut set up with Desktop & mobile devices.
What’s more important is to know about the methods via which you can complete the setup process with your devices.
Cricut Explore Series, Maker Series & Joy
Intending to set up the Explore & Maker series with PCs, you need to read the steps penned down in the next section:
Windows/Mac
- First, you need to plug in the machine and switch it on.
- Second, connect your machine with USB Cable or Bluetooth (with all the instructions).
- Third, visit the Cricut Design Space official website and install the app.
- Next, follow the on-screen rules and create your ID or sign in.
- After completing that, start setting up your cutter on your Desktop.
- At last, you’ll be informed that the setup has come to an end when you’ll be called for a test cut.
Android/iOS
- Begin the setup process by plugging the machine and turning it on.
- Following this, open your Bluetooth device and pair it with your Android/iOS device.
- Now, install the Design Space application and launch it.
- After launching it, sign in by entering the details or creating your account.
- Next, you need to tick the Machine Setup mentioned under the Menu panel.
- Followed by this, choose your machine model and follow the on-screen Cricut Setup instructions to complete the setup process.
- The setup process will get concluded when you are prompted for a test cut.
Besides ending the cutting machine setup process, you need to grab details about the heat press setup process with the devices from the following section.
Cricut Set Up for Heat Presses
In order to set up the Cricut Mug Press and Hat Press machine on your desktop computer and mobile device, do the following steps:
Cricut Mug Press Set Up
- Open the Design Space app on your PC (Mac/Windows), and sign in by entering the login details.
- At the Cricut Welcome Setup page, choose Cricut Mug Press, available under Heat Press dropbox.
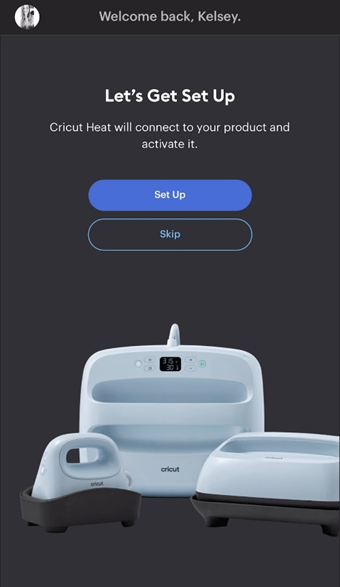
- To connect the press, read the on-screen instructions, check the firmware, and complete the activation process.
- After the machine gets activated, tick Get Started, and then you are ready to create the mug.
Cricut Hat Press Set Up
- First, you need to remove the packaging of all the provided items.
- Second, plug the power cord into the suitable wall pocket, and switch it on by clicking the Temperature button.
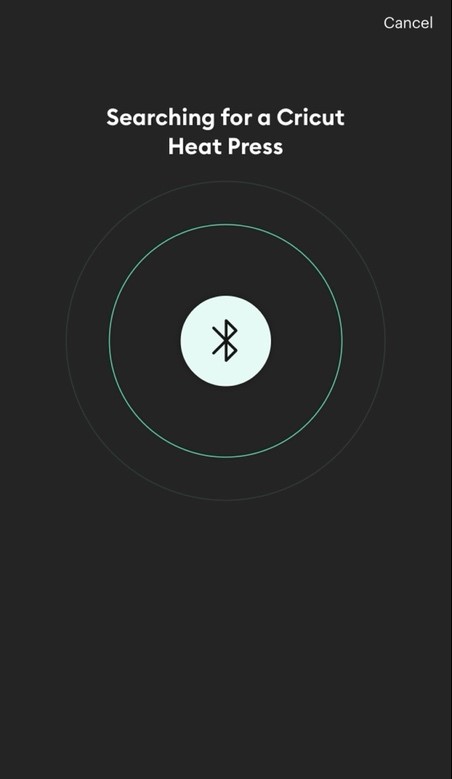
- Third, download the Heat App from the Play Store/App Store and open your Bluetooth device.
- After that, turn on the press within 7 ft range of the mobile device and let it communicate with the downloaded App.
- Next, you’ve to open the Heat App and tick the Set Up box to start the activation process.
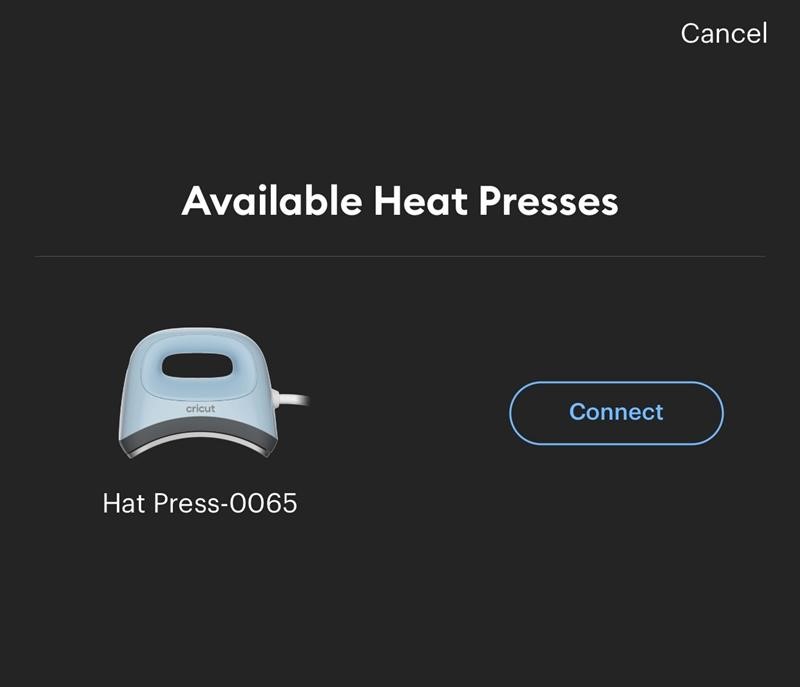
- Now, select the unit visible under the Available Heat Presses and press the Connect box.
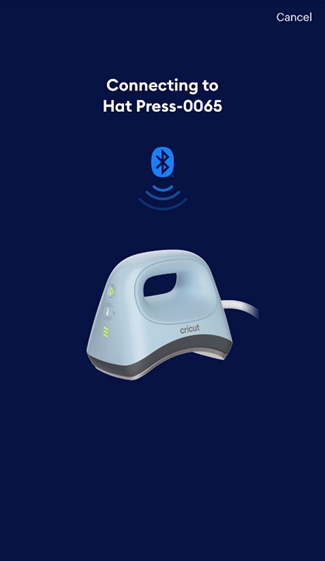
- Following this, the app will be sharing the Connecting to Hat Press notification with the Bluetooth logo.
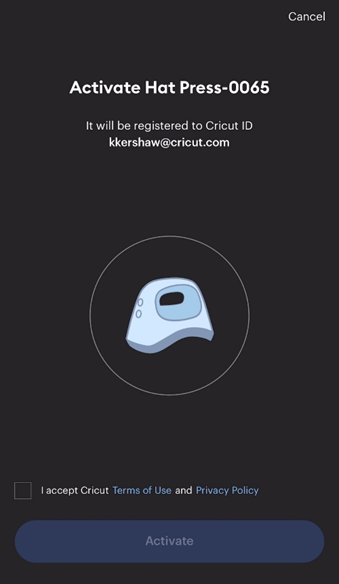
- Moreover, the app will ask about the confirmation of Hat Press activation, and the email address list will get shared.
- Next, you need to tick the Terms & Conditions and then Activate box.
- Finally, the installed app will be sharing the Hat Press activation status along with the message of set up successfully.
Conclusion
On the whole, to the post, you must learn complete info about the Cricut set up related to smart cutting machines along with heat presses. Moreover, it will be beneficial for you to follow the steps mentioned in the above-shared paragraphs. Other than that, you must choose the correct cutter before the cutting process. You are advised to keep in touch with us to get related content about the setup process.
FAQs
Question: How to Connect Cricut Maker with USB Cable?
Answer: Follow the steps to learn about how to connect Maker with a USB cable:
- Connect the USB cable end to your Desktop and the other end to your Maker port.
- Ensure that your machine is powered on and the power button will lit up and white.
- Go back to the Cricut Design Space New Machine Setup page.
- Your machine will be shown connected during the setup process.
Question: Is It Compulsory to Install Design Space During Cricut Machine Setup?
Answer: Intending to successfully complete the Cricut set up process, every user must download and install the Design Space app. Once the app is installed on PC/ mobile devices, the Cricut products will give the result as per the necessities. With this software, the user will be able to design the pattern by using various shapes, symbols, and images.
Question: How Can I Update Cricut EasyPress 3 firmware?
Answer: You’ve completed the EasyPress 3 firmware process by following the steps below:
- Plug the unit into a compatible wall outlet and click the power button to turn it on.
- Verify that the press is paired with your mobile device.
- After that, you need to open the Heat app and sign in.
- Choose your press from My Presses, and the firmware will get started.