All the Cricut machines come with Bluetooth connectivity so that they can connect to all types of PC and smartphone devices. And from time to time, it is common to get issues related to Bluetooth connectivity. The same is true for your Cricut Explore Air 2 machine. There can be various reasons why you will get printer connectivity-related issues. Some of the significant reasons to face this issue could be compatibility, restrictions, distance between the devices, incorrect configuration, and many others. If you are having the issue of Cricut Explore Air 2 not connecting to Bluetooth, then further content will offer you all the essential solutions you can use to get rid of this problem.
Solution 1: Make Sure Your Cricut Explore Air 2 is Ready to Pair
You may face the issue of connecting the Explore 2 machine to a device if the printer is not on or far away from the device. In this case, here are the steps that can help you resolve the connectivity issue.
- Firstly, make sure the printer is plugged into a power supply and is turned ON.
- After that, ensure that there is not much distance between the Explore 2 and the device you want to establish a Bluetooth connection.
- Next, you have to open the Settings window by choosing the Windows key + X key on your keyboard.
- And then, head to the Devices option.
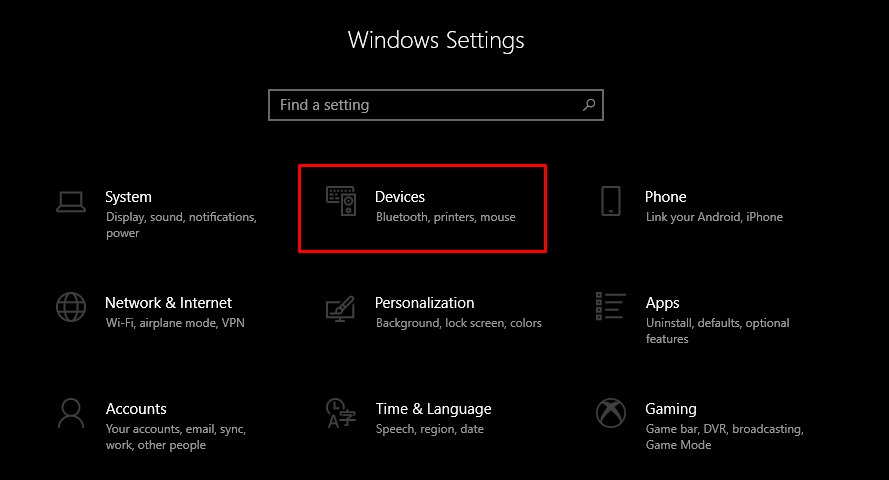
- Now, check if the Bluetooth toggle is set to ON and then click on the option Add Bluetooth or another device.
- Furthermore, select the Bluetooth option and wait for your computer to scan for your Explore 2 machine.
- Click on your machine option from the result and enter the PIN code 0000 if asked to do so.
- After that, the connected message will appear on the screen when the connection is established between both devices.
Solution 2: Ensure that a Windows Firewall is Not Restricting Your Device
The Windows Firewall on your PC or antivirus on your phone can stop your Cricut Explore Air 2 machine. Follow the below method to solve the Cricut Explore Air 2 not connecting to Bluetooth issue.
- Go to the search section on the taskbar and type Windows Firewall in the field.
- After that, you are required to give permission to the app through Windows Firewall.
- Next, head to the Windows Firewall settings and select the option of Change Settings.
- Then, you have to navigate to the list and tick the checkbox of the Cricut software.
- Moreover, select the option for both the Private and Public options.
- If the option of Cricut app registered does not show, then choose to Allow another app option.
- Now, head to the installation folder of your Cricut software.
- Lastly, follow step 4 once again to attach the result file.
Solution 3: Remove Any Other Device Connected to Your PC
If any other device is already connected to your PC, it can face issues while connecting. Thus you need to remove the other device by following the below steps.
- Begin by pressing on the Start menu and selecting the Settings option.
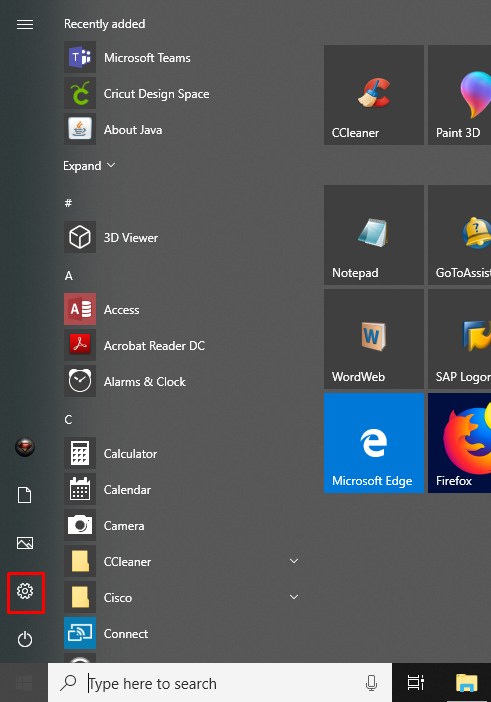
- Afterward, open the Devices window by selecting its option.
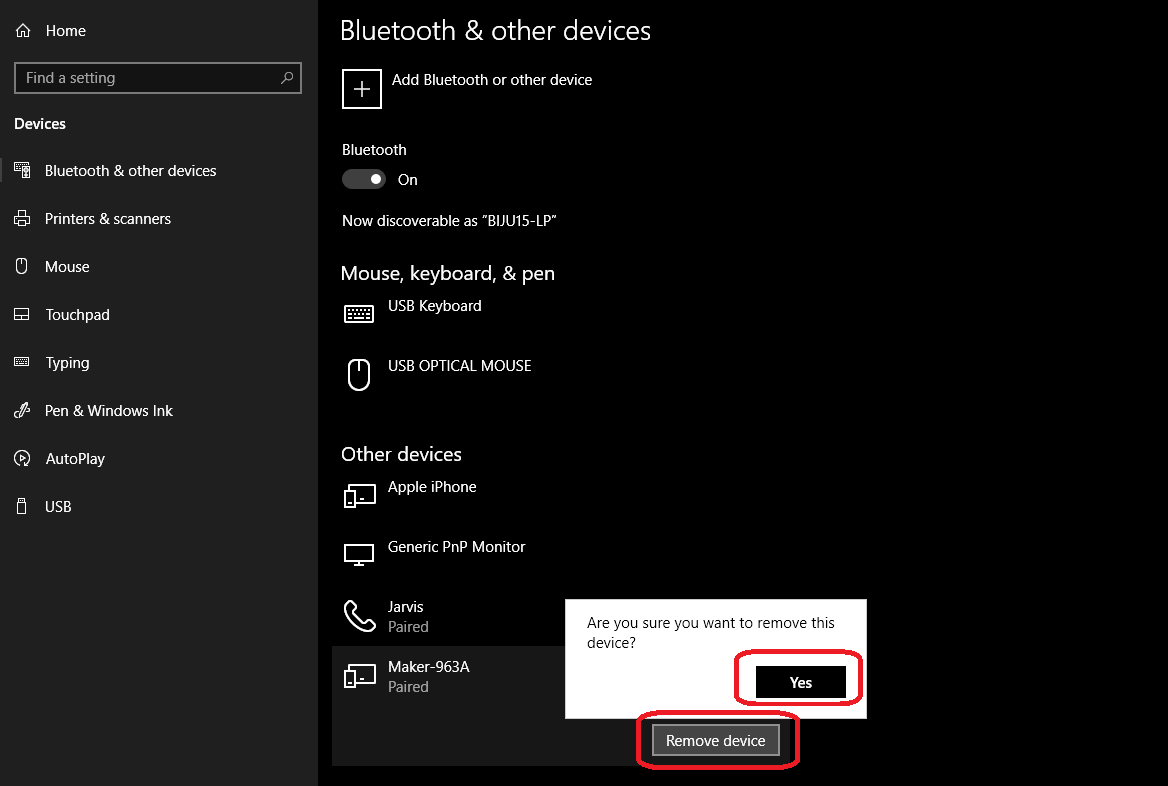
- Now, choose the device you want to remove from your PC and click on the Remove Device option.
- And then confirm your action by choosing the right option.
- Finally, you can try to pair your Cricut Explore Air 2 device to see if the problem is resolved.
Solution 4. Update the Software of Your Explore Air 2
Cricut Explore Air 2 not connecting to Bluetooth issues can arise due to outdated software on the machine. Here are the steps you need to follow to update the software of your Explore Air 2 machine.
- Start by pressing the Windows and X buttons simultaneously on the keyboard.
- When a list of options appears on the screen, click on the Device Manager.
- In the device manager screen, select the option of Cricut Explore Air 2 machine and right-press on it.
- After that, choose the option of Update Driver Software.
- Once the driver is updated, try to complete the Bluetooth pairing process.
Frequently Asked Questions
How do I reset my Cricut Explore Bluetooth?
The steps to reset the Cricut Explore Bluetooth are as follows.
- First, go to the Settings and choose the Bluetooth option.
- Then, please turn on the Bluetooth option after turning it on.
- After that, click on the Gear icon next to the Cricut Explore Air 2 machine.
- Lastly, select the Forget option.
Is there a Bluetooth button on the Cricut Explore Air 2?
No, there is no Bluetooth button on the Cricut Explore Air 2 machine. This machine comes with inbuilt connectivity that allows devices to connect. For connection, keep both devices close to each other and turn on the Cricut machine.
How do I connect the Cricut Explore Air 2 Bluetooth to my Mac?
The steps to connect the Explore Air 2 machine to Mac via Bluetooth are as follows.
- Keep the Cricut and Mac devices within the range.
- After that, go to System Preferences and choose the Bluetooth option.
- Check if the Bluetooth is ON, then Select your Cricut machine from the device.
- Then follow the prompt to complete the pairing procedure.